I’ve already written that I’ve rented a root server for myself two years ago. While that machine works and serves things quite reliably, I feel it aging. It’s an Ubuntu 16.04 system, it has only 4 GB of RAM and a quite outdated Athlon64 processor. Due to these parameters, it is not possible to run virtualized setups – which I would really like to do to separate services. E.g. that machine has a complete E‑Mailserver setup which I intended to use for my private E‑Mail but still hesitate to activate as it is rather complex and „manually setup”. I followed an instruction guide on the internet which even its author says is outdated these days.
There are other shortcomings like a less-than-optimal Let’s‑encrypt setup. Let’s encrypt started almost at the same time as my server installation and there have been quite some optimizations since then. All in all, my setup is aging, it is not sufficient for much more stuff on it and today, you get far more capable hardware for not so much more money.
Computer network wiring (symbolic picture)
Having the chance to start „from scratch” with the system design, I thought myself: „Hey, it’s 2018. IPv4 has run out of address space for more than five years. IPv6 has been available for a decade or so. Let’s do this in a modern way.” So, I decided on the following basic system design:
- I assume to have only one IPv4 address but a sufficiently large IPv6 network routed to the rented server.
- I build the system in a way that all „real” services run in virtual machines managed by Linux’ KVM system.
- The KVM „host” (i.e. the „main”, unvirtualized machine) gets the IPv4 address.
- All „guests” get only IPv6 addresses. No official IPv4, not even a dual stack with private IPv4 and masquerading. Only IPv6.
- Guests can access IPv4-only services on the internet (yes, it’s 2018… hello github.com…) through a NAT64/DNS64 gateway on the host.
- Services on the guests are only generally available from IPv6 addresses.
- To serve incoming IPv4 requests, application proxies on the KVM host forward traffic to the actual service handlers on the guest if needed.
- If for any reason a guest system absolutely needs its own IPv4 connectivity, it is added „on top” of the setup.
The hardware
I use a rented server in the data center of a hosting provider. I am using the German provider „Hetzner” already for many years, so I went there for this project, too. The hardware is a dedicated root server – i.e. „bare metal” – with a Core i7 Hexacore CPU, 64 GB RAM, and two 3 TB enterprise-grade Harddisks. I rented it from their „used servers shop”.
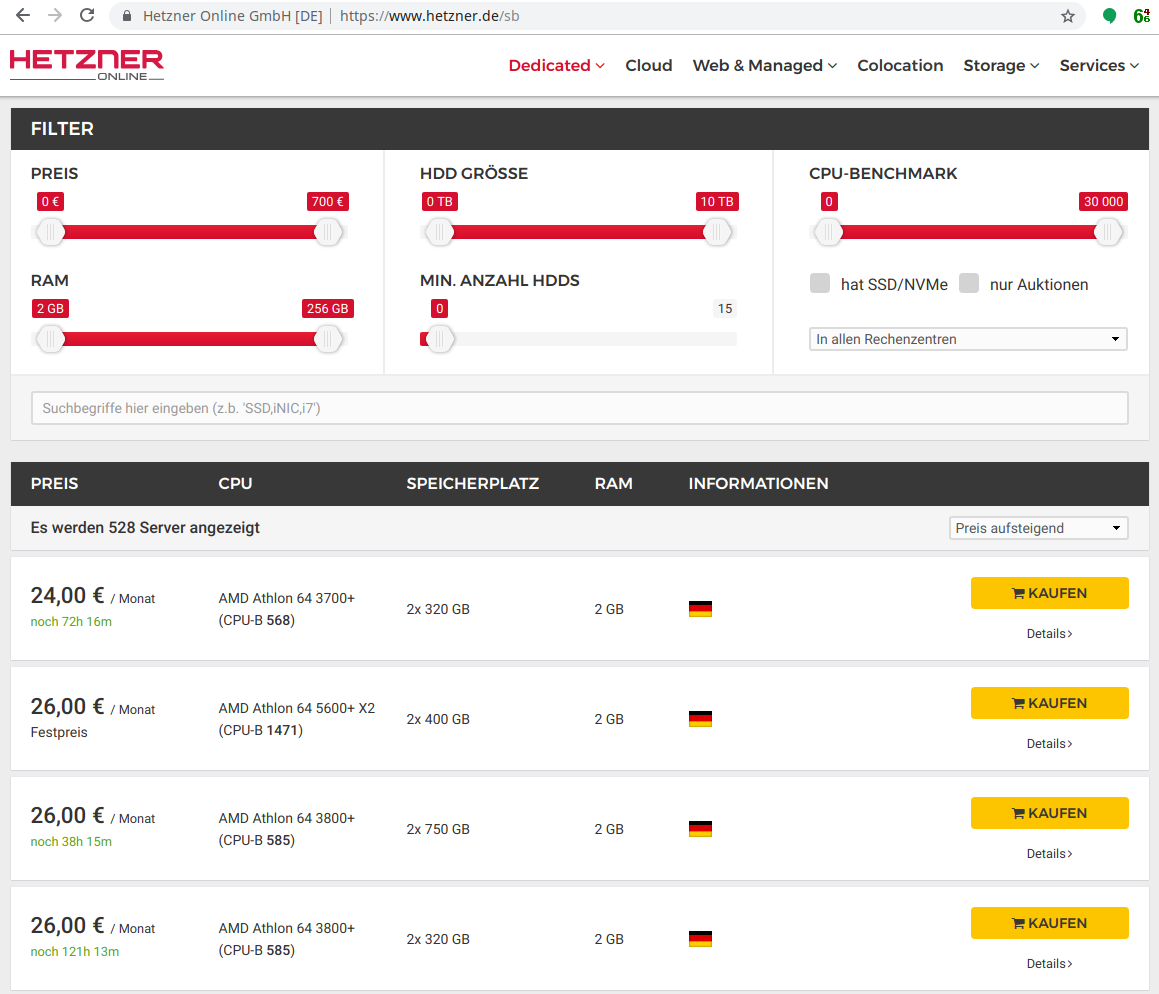
Hetzner Serverbörse – Manchmal gibt es hier echte Schnäppchen
For the rest of the articles, I will describe the setup in Hetzner’s environment. If you use another hosting provider, you will have to cope with their network configuration which might be different at some points. A critical point might be the IPv6 setup itself as Hetzner has a very – eeeerm – „interesting” approach to this. However, installation of the additional services and the virtual machines should be more or less the same regardless of how your server is connected to the hoster’s network.
Ok, let’s start.
Initial setup of the host system
I suggest that you access the server in this early stage by its IP address only. We’ll change the IPv6 address of the system later in the install process. If you want to have a DNS entry, use something interim to throw away later, e.g. „<plannedname>-install.example.org”.
I obtained my server in Hetzner’s „rescue system” which allows the OS installation through the installimage script. I wanted to work with as much default components and configurations as possible, so I decided for the Ubuntu 18.04 install image offered by Hetzner.
Booting into the new server gives you a welcoming login screen somehow like this:
|
1 2 3 4 5 6 7 8 9 10 11 12 13 14 15 16 17 18 19 20 21 22 23 24 25 26 27 28 29 30 31 32 33 34 35 36 |
dh@esmeralda:~$ ssh -l root 2a01:4f8:1:3::2 The authenticity of host ‚2a01:4f8:1:3::2 (2a01:4f8:1:3::2)’ can’t be established. ECDSA key fingerprint is SHA256:dbSkzn0MlzoJXr8yeEuR0pNp9FEH4mNsfKgectkTedk. Are you sure you want to continue connecting (yes/no)? yes Warning: Permanently added ‚2a01:4f8:1:3::2′ (ECDSA) to the list of known hosts. — — — — — — — — — — — — — — — — — — — — — — - Welcome to the Hetzner Rescue System. This Rescue System is based on Debian 8.0 (jessie) with a newer kernel. You can install software as in a normal system. To install a new operating system from one of our prebuilt images, run ‚installimage’ and follow the instructions. More information at http://wiki.hetzner.de — — — — — — — — — — — — — — — — — — — — — — - Hardware data: CPU1: AMD Athlon(tm) 64 X2 Dual Core Processor 5600 (Cores 2) Memory: 3704 MB Disk /dev/sda: 750 GB (=> 698 GiB) Disk /dev/sdb: 750 GB (=> 698 GiB) Total capacity 1397 GiB with 2 Disks Network data: eth0 LINK: yes MAC: 00:24:21:21:ac:99 IP: 241.61.86.241 IPv6: 2a01:4f8:1:3::2/64 RealTek RTL-8169 Gigabit Ethernet driver root@rescue ~ # |
You might want to write down MAC address and IP addresses of the system. Note, however, that they are also included in the delivery e‑mail sent by Hetzner when the server is ready.
The system has two hard disks. I use them as a software RAID 1 as offered by the install script. This allows for at least some disaster recovery in case of a disk failure. And for systems like this, I do not install any partitions at all (apart from the Hetzner-suggested swap and /boot partition). The KVM disks will go to qcow2 files which are just put into the host’s file system. Modern file systems, fortunately, do not have any problems with 200 GB files and this way, all the virtual guest hard disks are also covered by the RAID.
Hetzner’s installimage process is controlled by a configuration file. Its (striped-down) version for the system I work on reads like this:
|
1 2 3 4 5 6 7 8 9 10 11 12 13 14 15 16 17 18 19 20 21 22 23 24 25 |
## HARD DISK DRIVE(S): # Onboard: SAMSUNG HD753LJ DRIVE1 /dev/sda # Onboard: SAMSUNG HD753LJ DRIVE2 /dev/sdb ## SOFTWARE RAID: ## activate software RAID? < 0 | 1 > SWRAID 1 ## Choose the level for the software RAID < 0 | 1 | 10 > SWRAIDLEVEL 1 ## BOOTLOADER: BOOTLOADER grub ## HOSTNAME: HOSTNAME whatever (change this one to your system name, not with domain name) ## PARTITIONS / FILESYSTEMS: (keep the defaults) PART swap swap 4G PART /boot ext3 512M PART / ext4 all ## OPERATING SYSTEM IMAGE: (you have selected this earlier in installimage) IMAGE /root/.oldroot/nfs/install/../images/Ubuntu-1804-bionic-64-minimal.tar.gz |
Just to be sure: If you use installimage (or similar installation routines from other providers) on an existing system, all data will be deleted on that system. If unsure, check twice that you are on the right system. A mistake at this point may be impossible to correct afterward!
|
1 2 3 4 5 6 7 8 9 10 11 12 13 14 15 16 17 18 19 20 21 22 23 24 25 26 27 28 29 30 31 32 33 34 35 36 37 38 39 40 41 42 43 |
Hetzner Online GmbH - installimage Your server will be installed now, this will take some minutes You can abort at any time with CTRL C ... : Reading configuration done : Loading image file variables done : Loading ubuntu specific functions done 1/16 : Deleting partitions done 2/16 : Test partition size done 3/16 : Creating partitions and /etc/fstab done 4/16 : Creating software RAID level 1 done 5/16 : Formatting partitions : formatting /dev/md/0 with swap done : formatting /dev/md/1 with ext3 done : formatting /dev/md/2 with ext4 done 6/16 : Mounting partitions done 7/16 : Sync time via ntp done : Importing public key for image validation done 8/16 : Validating image before starting extraction done 9/16 : Extracting image (local) done 10/16 : Setting up network config done 11/16 : Executing additional commands : Setting hostname done : Generating new SSH keys done : Generating mdadm config done : Generating ramdisk done : Generating ntp config done 12/16 : Setting up miscellaneous files done 13/16 : Configuring authentication : Fetching SSH keys done : Disabling root password done : Disabling SSH root login without password done : Copying SSH keys done 14/16 : Installing bootloader grub done 15/16 : Running some ubuntu specific functions done 16/16 : Clearing log files done INSTALLATION COMPLETE You can now reboot and log in to your new system with the same password as you logged in to the rescue system. root@rescue ~ # reboot |
Installing the system this way brings a fresh and rather small Ubuntu system on the disk. Note that ssh will complain massively about the changed host key of the system, but that is ok. You’re now booting the installed system which has another host key than the rescue system you used before.
|
1 2 3 4 5 6 7 8 9 10 11 12 13 14 15 16 17 18 19 20 21 22 |
dh@esmeralda:~$ ssh -l root 2a01:4f8:1:3::2 @@@@@@@@@@@@@@@@@@@@@@@@@@@@@@@@@@@@@@@@@@@@@@@@@@@@@@@@@@@ @ WARNING: REMOTE HOST IDENTIFICATION HAS CHANGED! @ @@@@@@@@@@@@@@@@@@@@@@@@@@@@@@@@@@@@@@@@@@@@@@@@@@@@@@@@@@@ IT IS POSSIBLE THAT SOMEONE IS DOING SOMETHING NASTY! [...] Offending ECDSA key in /home/dh/.ssh/known_hosts remove with: ssh-keygen -f „/home/dh/.ssh/known_hosts” -R „2a01:4f8:1:3::2” ECDSA host key for 2a01:4f8:1:3::2 has changed and you have requested strict checking. Host key verification failed. dh@esmeralda:~$ ssh-keygen -f „/home/dh/.ssh/known_hosts” -R „2a01:4f8:1:3::2” # Host 2a01:4f8:1:3::2 found /home/dh/.ssh/known_hosts updated. dh@esmeralda:~$ ssh -l root 2a01:4f8:1:3::2 The authenticity of host ‚2a01:4f8:1:3::2 (2a01:4f8:1:3::2)’ can’t be established. ECDSA key fingerprint is SHA256:z2 iz/3RRC3j6GT8AtAHJYnZvP9kdzw8fW8Aw5GPl0q. Are you sure you want to continue connecting (yes/no)? yes Warning: Permanently added ‚2a01:4f8:1:3::2′ (ECDSA) to the list of known hosts. Welcome to Ubuntu 18.04.1 LTS (GNU/Linux 4.15.0-38-generic x86_64) [...] root@merlin ~ # |
After having booted into it, I had some hours of remarkably degraded performance as the RAID 1 had to initialize the disk duplication completely. Be aware of this, your server will become faster once this is over. Use cat /proc/mdstat to see what’s going on on your harddisks.
|
1 2 3 4 5 6 7 8 9 10 11 12 13 14 |
root@merlin ~ # cat /proc/mdstat Personalities : [linear] [multipath] [raid0] [raid1] [raid6] [raid5] [raid4] [raid10] md0 : active raid1 sdb1[1] sda1[0] 4190208 blocks super 1.2 [2/2] [UU] md2 : active raid1 sdb3[1] sda3[0] 727722816 blocks super 1.2 [2/2] [UU] [>....................] resync = 4.0% (29775168/727722816) finish=147.8min speed=78670K/sec bitmap: 6/6 pages [24KB], 65536KB chunk md1 : active raid1 sdb2[1] sda2[0] 523712 blocks super 1.2 [2/2] [UU] unused devices: <none> |
Once the mail server setup is available you should enable alarming messages if the RAID degrades due to disk failure. A RAID only protects against hardware failures if the actually failed hardware is replaced quick enough.
- Activate the „rescue system boot” in the Robot interface. Select your ssh key so that you do not have to enter a password
- Reboot the machine.
- Logging in via ssh after 1 to 2 minutes should bring up the rescue system. Just reboot the machine from the command line – there is no need to rescue now.
- The system will come up again into the installed system.
If something is wrong here, contact support and let them solve the problem. If you make mistakes in the Host’s network configuration, you will need the rescue mode to sort things out.
Preparing the network settings of the host
We do now have a freshly installed system. Unfortunately, it is not quite ready to serve as a KVM host. For this, we first have to configure a network bridge on the system.
I need to say here that this setup is some „special” to Hetzner’s IPv6 approach. Unfortunately, you do only get a single IPv6 ::/64 network. Due to the way how IPv6 works, you can not split this network sensibly into smaller ones. I really suggest reading Why Allocating a /64 is Not Wasteful and Necessary and especially The Logic of Bad IPv6 Address Management to find out how the semantics of the IPv6 address space differ from the IPv4 one. If you have a hoster who gives you a ::/56 or even ::/48 network, you can surely manage your addresses differently. Most probably, you will go with a routed setup. However, this is beyond the scope of this guide.
We have to take what we get. This is how I set up my machine as KVM host in the Hetzner IPv6 network.
The general start
We’ll see that there are different network setups. However, some steps have to be performed nevertheless:
- First, I enabled IPv6 forwarding globally:
1sysctl -w net.ipv6.conf.all.forwarding=1 - Also enable this setting in
/etc/sysctl.confto make it permanent. - Use
ip ato get device name and MAC address of the physical network card of the system:123456789101112131415root@merlin ~ # ip a1: lo: <LOOPBACK,UP,LOWER_UP> mtu 65536 qdisc noqueue state UNKNOWN group default qlen 1000link/loopback 00:00:00:00:00:00 brd 00:00:00:00:00:00inet 127.0.0.1/8 scope host lovalid_lft forever preferred_lft foreverinet6 ::1/128 scope hostvalid_lft forever preferred_lft forever2: enp2s0: <BROADCAST,MULTICAST,UP,LOWER_UP> mtu 1500 qdisc fq_codel state UP group default qlen 1000link/ether 00:24:21:21:ac:99 brd ff:ff:ff:ff:ff:ffinet 241.61.86.241/32 scope global enp2s0valid_lft forever preferred_lft foreverinet6 2a01:4f8:1:3::2/64 scope globalvalid_lft forever preferred_lft foreverinet6 fe80::224:21ff:fe21:ac99/64 scope linkvalid_lft forever preferred_lft foreverYour network device’s name may differ. It can be something like
enpXsYas in this example orenoX. On all modern Linux distributions, it will begin withen, however…
Here the common track for all systems ends. In the Linux world, multiple network configuration setups have evolved over time. The most common ones are:
- Direct setup in configuration files in
/etc/network. This is old-school networking setup, especially when combined with a System-V-initialisation process. I do not cover this here but you find a plethora of installation guides on the internet for this. - Systemd-based configuration with files in
/etc/systemd/network. This is how many modern distributions handle system start and network setup these days. Ubuntu did it until 17.04, Hetzner’s Ubuntu did it longer. I cover this two sections further. - Netplan with a configuration in
/etc/netplan. This kind of „meta-configuration” is used by Ubuntu since 17.10 and by Hetzner since November 2018 for 18.04 and 18.10. I describe the needed changes in the following section.
Ubuntu 18.04 with Netplan
Ubuntu 18.04 comes with a relatively new tool named Netplan to configure the network. Since about November 2018, Hetzner uses this setup in their install process. Note that earlier Ubuntu installations are provided with the systemd-networkd-based setup described below.
Netplan uses configuration files with YAML syntax. In most cases, there is only one file. Change the network configuration like this:
- You find the network configuration in
/etc/netplan/01-netcfg.yaml.
It looks somehow like this:123456789101112131415root@merlin /etc/netplan # cat 01-netcfg.yaml### Hetzner Online GmbH installimagenetwork:version: 2renderer: networkdethernets:enp2s0:addresses:- 241.61.86.241/32- 2a01:4f8:1:3::2/64routes:- on-link: trueto: 0.0.0.0/0via: 241.61.86.225gateway6: fe80::1Change it like this:
12345678910111213141516171819202122root@merlin ~ # cat /etc/netplan/01-netcfg.yaml### Hetzner Online GmbH installimagenetwork:version: 2renderer: networkdethernets:enp2s0:dhcp4: falsedhcp6: falsebridges:br0:macaddress: 00:24:21:21:ac:99interfaces:- enp2s0addresses:- 241.61.86.241/32- 2a01:4f8:1:3::2/64routes:- on-link: trueto: 0.0.0.0/0via: 241.61.86.225gateway6: fe80::1You disable both DHCP protocols on the physical device and attach it to the newly defined bridge device
br0. That bridge gets all definitions from the physical device. It also gets the MAC address of the physical device, otherwise, Hetzner’s network will not route any packets to it. - After a reboot, the network device list should look like this:
1234567891011121314151617root@merlin ~ # ip a1: lo: <LOOPBACK,UP,LOWER_UP> mtu 65536 qdisc noqueue state UNKNOWN group default qlen 1000link/loopback 00:00:00:00:00:00 brd 00:00:00:00:00:00inet 127.0.0.1/8 scope host lovalid_lft forever preferred_lft foreverinet6 ::1/128 scope hostvalid_lft forever preferred_lft forever2: enp2s0: <BROADCAST,MULTICAST,UP,LOWER_UP> mtu 1500 qdisc fq_codel master br0 state UP group default qlen 1000link/ether 00:24:21:21:ac:99 brd ff:ff:ff:ff:ff:ff3: br0: <BROADCAST,MULTICAST,UP,LOWER_UP> mtu 1500 qdisc noqueue state UP group default qlen 1000link/ether 00:24:21:21:ac:99 brd ff:ff:ff:ff:ff:ffinet 241.61.86.241/32 scope global br0valid_lft forever preferred_lft foreverinet6 2a01:4f8:1:3::2/64 scope globalvalid_lft forever preferred_lft foreverinet6 fe80::224:21ff:fe21:ac99/64 scope linkvalid_lft forever preferred_lft forever
Note that the physical device
enp2s0and the bridgebr0have the same MAC address. This is intentional! - You should test that you can log in to the system through both IPv6 and IPv4 protocol.
Ubuntu 18.04 and other systems with systemd-networkd
Until October 2018, Hetzner used a systemd-networkd-based setup on Ubuntu, even with 18.04. If you have such a system, you get the same result in a different way. Creating a bridge for virtual machines using systemd-networkd explains the basics nicely.
With this system, you change the network setup as follows:
- Go to
/etc/systemd/network. - Define a bridge device in file
19-br0.netdev:1234567[NetDev]Name=br0Kind=bridgeMACAddress=<MAC address of the physical network card of the host>[Bridge]STP=trueIt is extremely important to define the MAC address, or Hetzner will not route traffic to the system. STP seems not mandatory, does not hurt either. I kept it in.
- Assign bridge to physical device in
20-br0-bind.network:12345[Match]Name=eno1[Network]Bridge=br0 - Copy the original file created by Hetzner (here:
10-eno1.network) to21-br0-conf.networkand replace the matching name from the physical device to the bridge. In fact, you only replace theeno1(or whatever you network device’s name is) withbr0:1234567891011[Match]Name=br0[Network]Address=<IPv6 address assigned by Hetzner, do not change>Gateway=fe80::1 // This is always the IPv6 gateway in Hetzner’s network setupGateway=<IPv4 gateway assigned by Hetzner, do not change>[Address]Address=<IPv4 address of the system assigned by Hetzner, do not change>Peer=<IPv4 peer assigned by Hetzner, do not change> - Rename the original file
10-eno1.networkto something not detected by systemd, e.g.10-eno1.networkNO. Keep it around in case something goes wrong.
After these changes, the physical device has not any networks attached. This is important so that the bridge can grab it on initialization. Let’s see whether everything works:
- Reboot the system
- If something goes wrong: Boot into rescue system, mount partition, rename
10-eno1.networkNOback into original name ending in.network. Reboot again. Investigate. Repeat until it works…
Ensure correct source MAC address
Our virtual machines will have their own MAC addresses. Otherwise, the IPv6 auto configuration would not work. Unfortunately, these MAC addresses will also leak through the bridge into the provider network and that might lead to trouble as the provider does only accept the MAC address of the main server as valid.
To prevent such problems perform MAC address rewriting using the ebtables command:
|
1 |
ebtables -t nat -A POSTROUTING -j snat –to-src <MAC address of the physical network card of the host> |
I’ve added this to /etc/rc.local. On a default installation of Ubuntu 18.04, this file does not exist. If you create it, make it look like this:
|
1 2 3 4 5 6 |
#!/bin/bash # force source MAC address of all packets to the official address of the physical server ebtables -t nat -A POSTROUTING -j snat –to-src 00:24:21:21:ac:99 exit 0 |
Replace the address in the example with your actual physical MAC address! Also, make the file executable with chmod +x /etc/rc.local.
„The internet” claims that you need to add other files to systemd for /etc/rc.local being evaluated in Ubuntu 18.04. At least for me this was not needed, it „just worked”. Check whether the rule has been added:
|
1 2 3 4 5 6 7 8 9 10 |
root@merlin ~ # ebtables ‑t nat ‑L Bridge table: nat Bridge chain: PREROUTING, entries: 0, policy: ACCEPT Bridge chain: OUTPUT, entries: 0, policy: ACCEPT Bridge chain: POSTROUTING, entries: 1, policy: ACCEPT -j snat –to-src 00:24:21:21:ac:99 –snat-target ACCEPT root@merlin ~ # |
Reboot the systems once more to check if the rule survives a reboot.
Install the Router Advertisement Daemon radvd
We have now a basically working KVM host system to be. Let’s start populating it with services. The first one is the „router advertisement”. It’s more or less the IPv6-version of the notorious DHCP service used in IPv4 setups to centralize the IP address management.
For this service, we use the radvd router advertisement daemon on the bridge device so that our virtual machines get their network setup automatically by reading IPv6 router advertisements.
- Install radvd and also radvdump for testing through the usual Debian/Ubuntu
1apt install radvd radvdump‚
- Create the configuration file
/etc/radvd.conf. It should contain the following definitions:12345678910111213interface br0{AdvSendAdvert on;AdvManagedFlag off;AdvOtherConfigFlag off;AdvDefaultPreference high;prefix <IPv6 network assigned by Hetzner>::/64{AdvOnLink on;AdvAutonomous on;AdvRouterAddr on;};};This initial
radvdconfig is pretty simple. We miss out RDNSS advertisements as we will install abindlater on the host. - Start
radvdand make it a permanent service (coming up automatically after reboot) using12systemctl start radvdsystemctl enable radvd - If you start
radvdumpsoon after starting radvd, you will see the announcements sent byradvdin irregular intervals. For some reason, radvd seems to stop sending unsolcitated advertisements after some time if noone is listening.
Change IPv6 address
Once radvd is running, the Host will assign itself an additional IP address constructed from SLAAC rules. At least mine did it even though comments in /etc/sysctl.conf said, it wouldn’t once IPv6 forwarding is globally enabled. However, if this happens, you will see another IPv6 address assigned to the bridge device.
While it is absolutely no problem to have multiple IPv6 addresses on the same device, it can make configuration of services more difficult as the correct address for outgoing messages has to be selected correctly. I unified both addresses by making the statically configured one the same as the once which SLAAC produces.
For this, just get rid of the address ending in „0:0:0:2” (written as „…::2”) the server has been initialized with during install as Hetzner’s default. Do like this:
- Use
ip ato get the address. It’s the one having that characteristicff:fesequence in the middle of the host part. Write it down!1234567root@merlin ~ # ip a[...]3: br0: <BROADCAST,MULTICAST,UP,LOWER_UP> mtu 1500 qdisc noqueue state UP group default qlen 1000[...]inet6 2a01:4f8:1:3:224:21ff:fe21:ac99/64 scope global dynamic mngtmpaddr noprefixroutevalid_lft 86392sec preferred_lft 14392sec[...] - Test that ssh to that address works. It will if you just follow this guide, but if you have some firewalls somewhere lurking around, the connection will fail. Make sure it works.
- Load the network configuration again. In the systemd-networkd-case it’s
/etc/systemd/network/21-br0-conf.network, for Netplan it’s/etc/netplan/01-netcfg.yaml. - Exchange the IPv6 address of the bridge device to the one discovered by SLAAC. E.g. if you have
12[Network]Address=2a01:4f8:1:3::2/64
in the systemd-networkd configuration file, change it to
12[Network]Address=2a01:4f8:1:3:56ab:98ff:fed4:27b/64In
/etc/netplan/01-netcfg.yaml, look for1234567network:[...]bridges:br0:[...]addresses:- 2a01:4f8:1:3::2/64and change it to
1- 2a01:4f8:1:3:224:21ff:fe21:ac99/64 - Reboot the system. In theory,
systemctl restart systemd-networkdshould be sufficient in the systemd-networkd case, but my system behaved strangely after that. - ssh to the new address should work. If it doesn’t, again use the rescue system to sort it out. After all, you can set the host part of the IPv6 address of the Host to anything between
0:0:0:2andffff:ffff:ffff:ffff. The Hetzner infrastructure routes traffic to all addresses to the interface. - The system should now have three IP addresses on the bridge device: The IPv4 address, the global IPv6 address and the link-local IPv6 address starting with
fe80. It looks like this:12345678910root@merlin ~ # ip a[...]3: br0: <BROADCAST,MULTICAST,UP,LOWER_UP> mtu 1500 qdisc noqueue state UP group default qlen 1000link/ether 00:24:21:21:ac:99 brd ff:ff:ff:ff:ff:ffinet 241.61.86.241/32 scope global br0valid_lft forever preferred_lft foreverinet6 2a01:4f8:1:3:224:21ff:fe21:ac99/64 scope global dynamic mngtmpaddr noprefixroutevalid_lft 86388sec preferred_lft 14388secinet6 fe80::224:21ff:fe21:ac99/64 scope linkvalid_lft forever preferred_lft forever
After having changed the IP address this way, enter it into DNS:
- Add an AAAA record in the domain the system should be reachable in.
- Add a PTR record in the hoster’s reversal IP entries. If there is already an entry for the former address, you can remove it by simply wiping out the server name and pressing „Enter”.
- While you’re at it, also add the A record and the PTR record for the IPv4 address of the Host.
At this stage, lean back for a moment! The difficult part is done. You have the network setup of your KVM host up and running. The rest is much easier and will not potentially kill network access to the system. Also, the stuff coming now is much less provider-specific. While the initial network setup might work considerably different with another hosting provider, chances are good that the following steps are the same regardless of where you have placed your host.
::2. You will not be able to access it through its DNS name. You might want to add a DNS entry for <servername>-rescue.example.org for such cases. Of course, you have to remember that, too…In part II of this article series, we continue with NAT64, DNS64, and – finally – the first virtual machines.
History
- 2019-04-28: MAC source rewriting added.
- 2019-08-05: Some typos and minor spelling corrections.
- 2020-08-09: Replaced by the IPv6-first guide